You can also use the new XP plugin in dashboard (if you're using a recent DB build, like 8.4 or later and you have the right license on the XP studio dongle).
With the plugin, you have access to all the published fields of your XP from within you dashboard panel.
To make a button that changes its text when a published field changes I would do the following:
1. Create a new panel.
2. Add your XP to the DashBoard Basic Tree View
- Click on the green plus, and pick New XPression. Type in the IP Address and give it a name in the next screen. It should now show up in the XPression tree in your basic tree view.

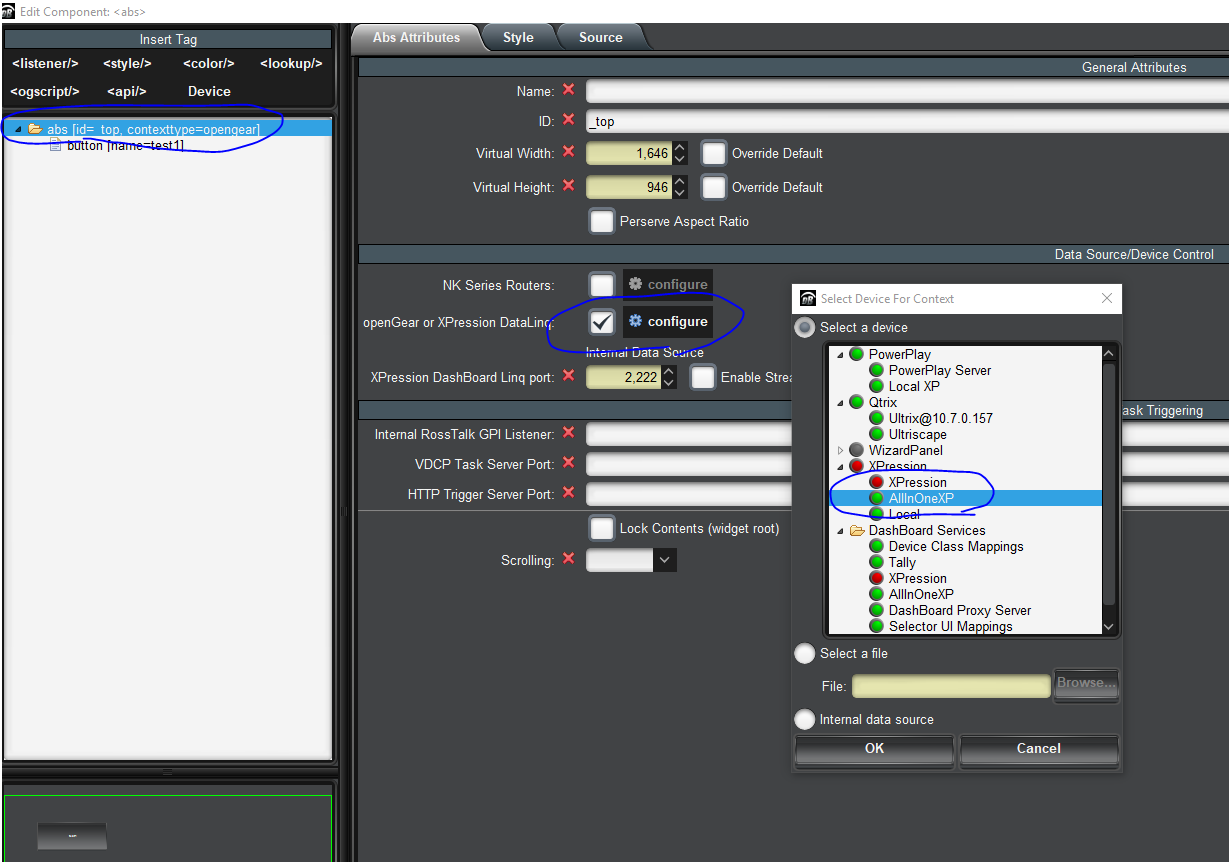
3. Point your panel (or an abs within the panel) to that XP:
- In panel builder mode, double click anywhere that is empty.
- Select the top level abs
- Configure the openGear or XPression Datalinq connection
- Select the XP you just added in step 2
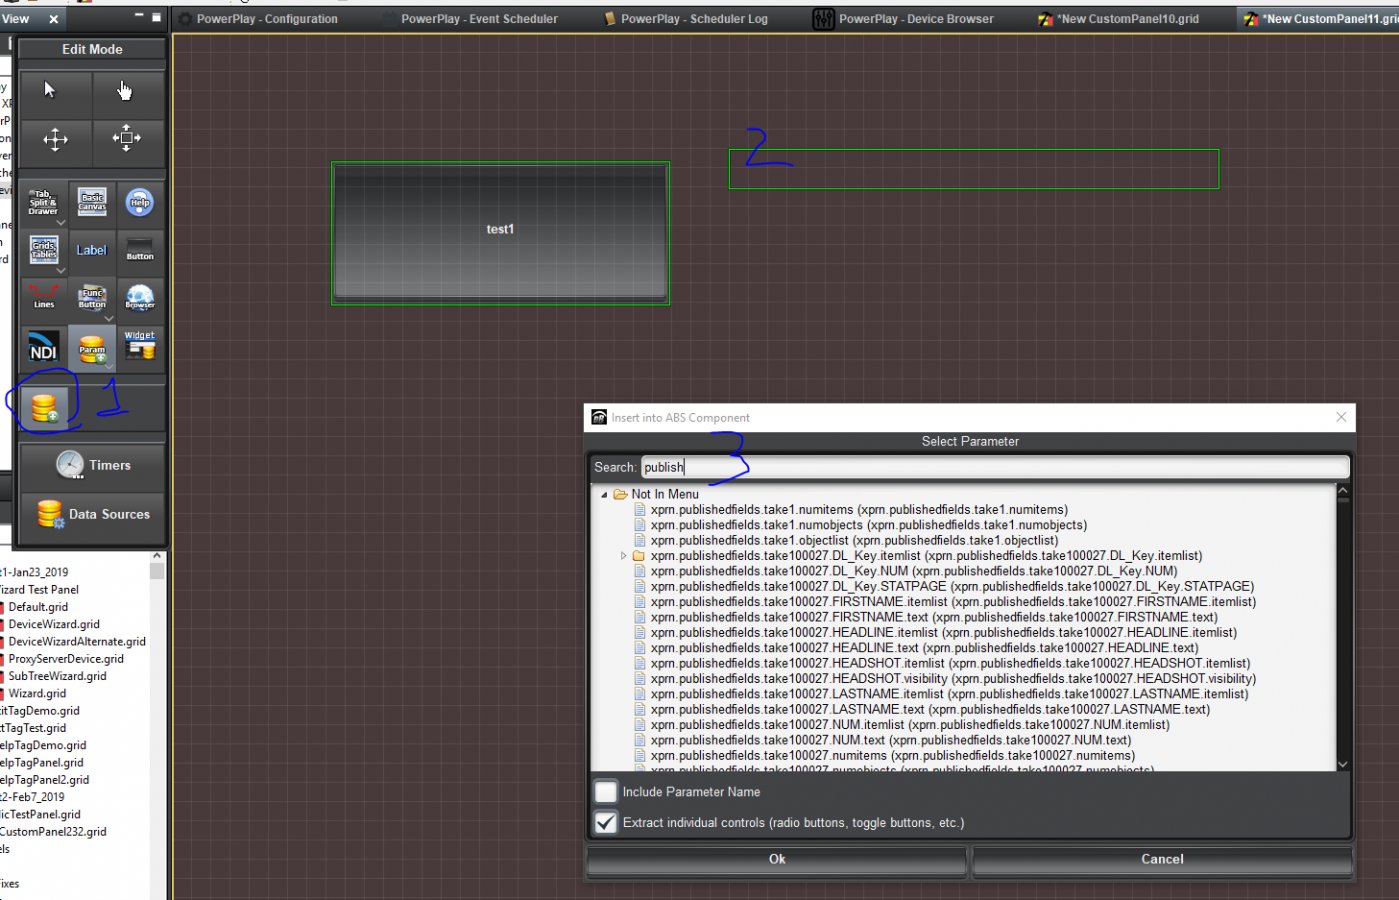
4. That will give you access to all the published fields from your XP. Let's add one to your panel
-In panel builder mode, select to drop a parameter in the abs.
-Drag and drop somewhere in your panel to drop the parameter
-In the parameter popup, you can search for "publish" or for the takeID of the item you care about. That will filter down the parameter to make it easier to find what you want.
-Pick the one you care about, and you should now see it in your panel.

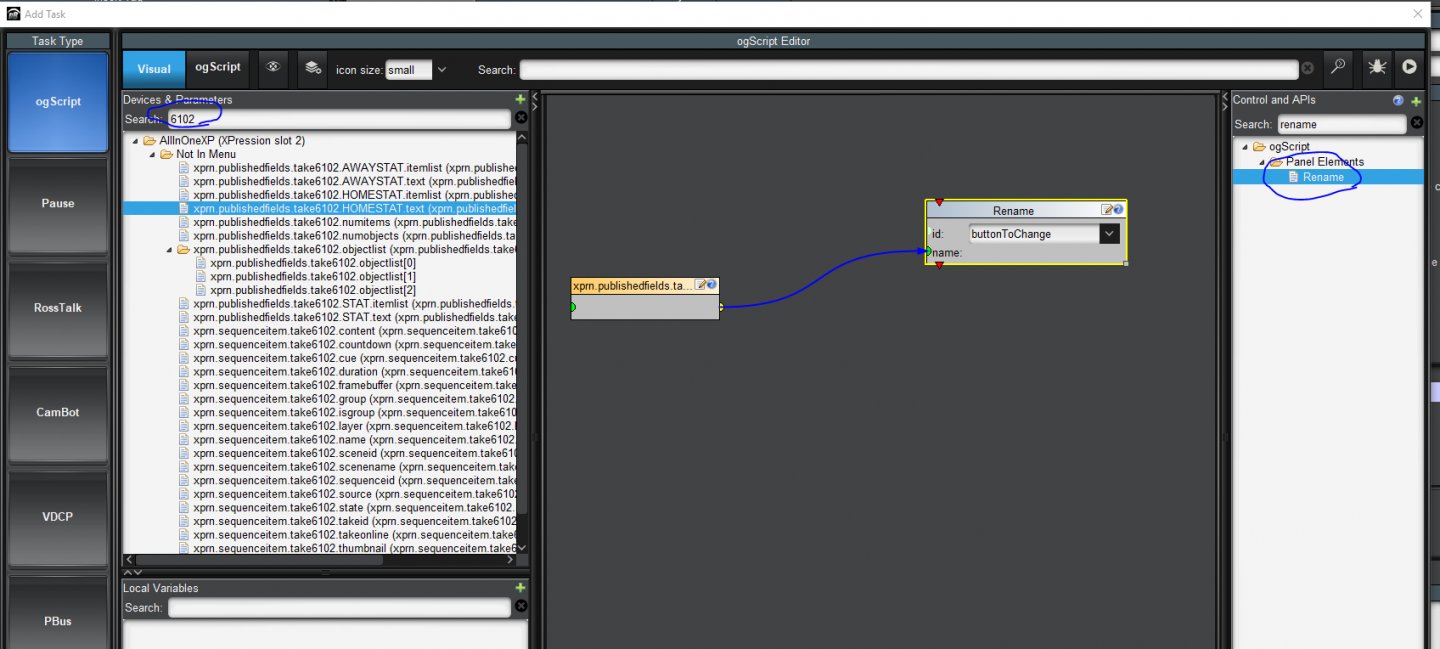
5. Create a button, and give it an ID like "buttonToChange"
6. Double click on the parameter you added, and add the following task to it.
-- In Visual Logic, you can find the same parameter by searching for the takeID or "publish" in the search bar.
-- Rename will rename your button to what the published field value is.
This will only trigger when the value of your published field changes.
If you prefer to not use Visual Logic, you can use the following ogscript instead:
ogscript.rename("buttonToChange", params.getValue('xprn.publishedfields.take6102.HOM ESTAT.text', 0));
That should do it. Any time the published field changes, your button name changes.
#DashBoard